The Enlightened Pilot
Proven 9-Step Path to Confident Mastery at the Helm
Why This Course Exists
Unfortunately, most boaters learn to steer by gathering and combining scattered tips with trial and error—the so-called “crash and learn” method. That method, with its uncertainty and gaps in understanding, lead to anxiety at the dock, hesitance and overreaction at the helm, fear of embarrassment and mistakes, and costly damage. And leaves prospective boaters doubting their ability to handle a boat is a real objection to getting involved.
The Enlightened Pilot changes that with a proven, step-by-step method that transforms nervous confusion into confidence, and prospects into captains.
The Three Phases
Phase 1 – Discover
Laying the Groundwork
Step 1: Speaking the Language
Before confidence comes clarity. Learn the commands and terms that let you communicate like a captain.Step 2: Mastering Natural Forces
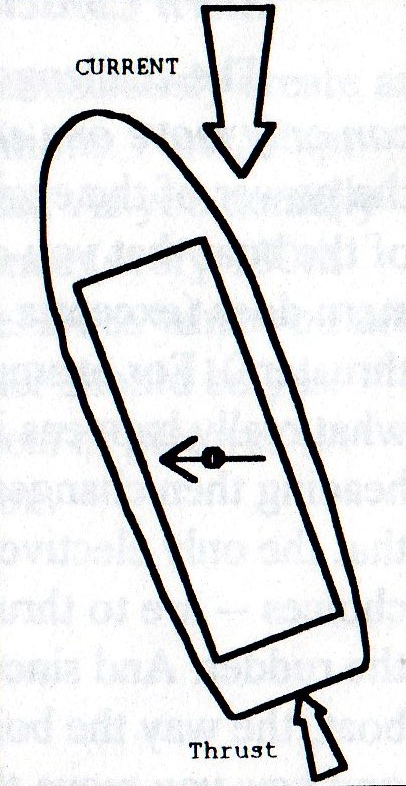
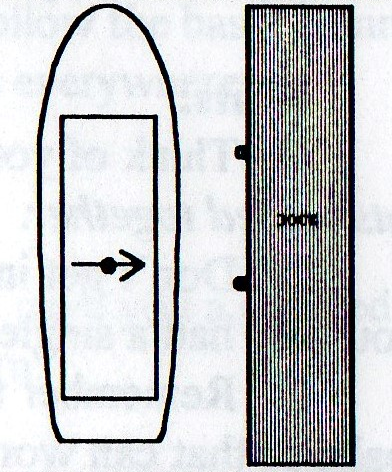
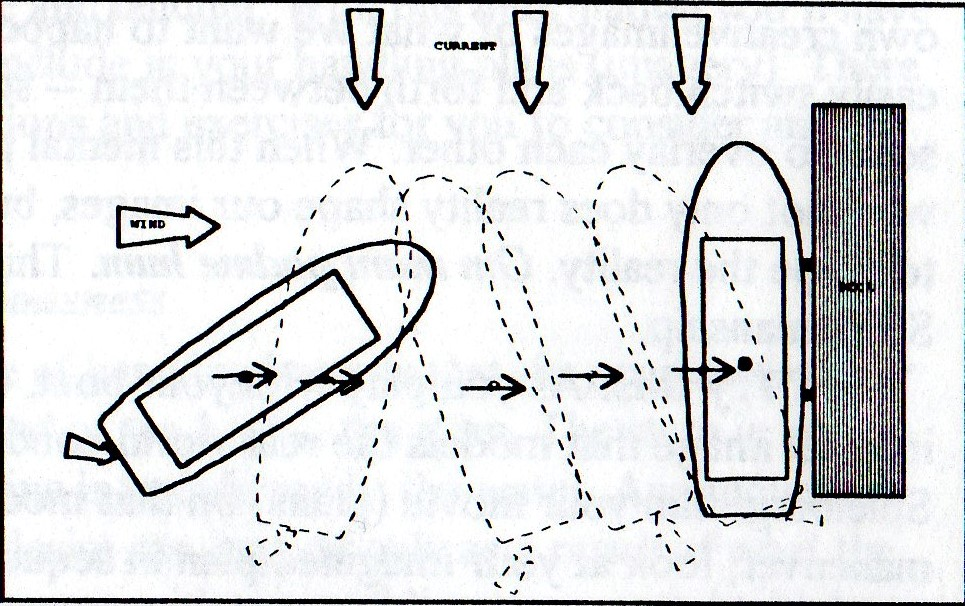
Conditions like winds and currents are not adversaries. Learn to work with them instead of fighting them.Step 3: Propulsion & Design
Discover how boats are built to move and why they respond the way they do. Familiarity leads to control.
Before: Confused by jargon, rattled by conditions, guessing at boat response.
After: Fluent, prepared, and able to anticipate how your boat will behave.
Phase 2 – Confidence
Taking Command
Step 4: The Helm
The helm is where knowledge becomes action, science becomes art. Learn smooth throttle and steering control.Step 5: Seeing & Imaging
Train your eyes and instincts to gauge conditions and movement. Train your mind to visualize and plan maneuvers before they happen.Step 6: Handling the Vessel
Practice planned maneuvers in real conditions until they become second nature.
Before: Nervous at the wheel, unprepared and rough in tight quarters.
After: Calm, precise, planned maneuvers that show real finesse.
Phase 3 – Freedom
Mastery at the Helm
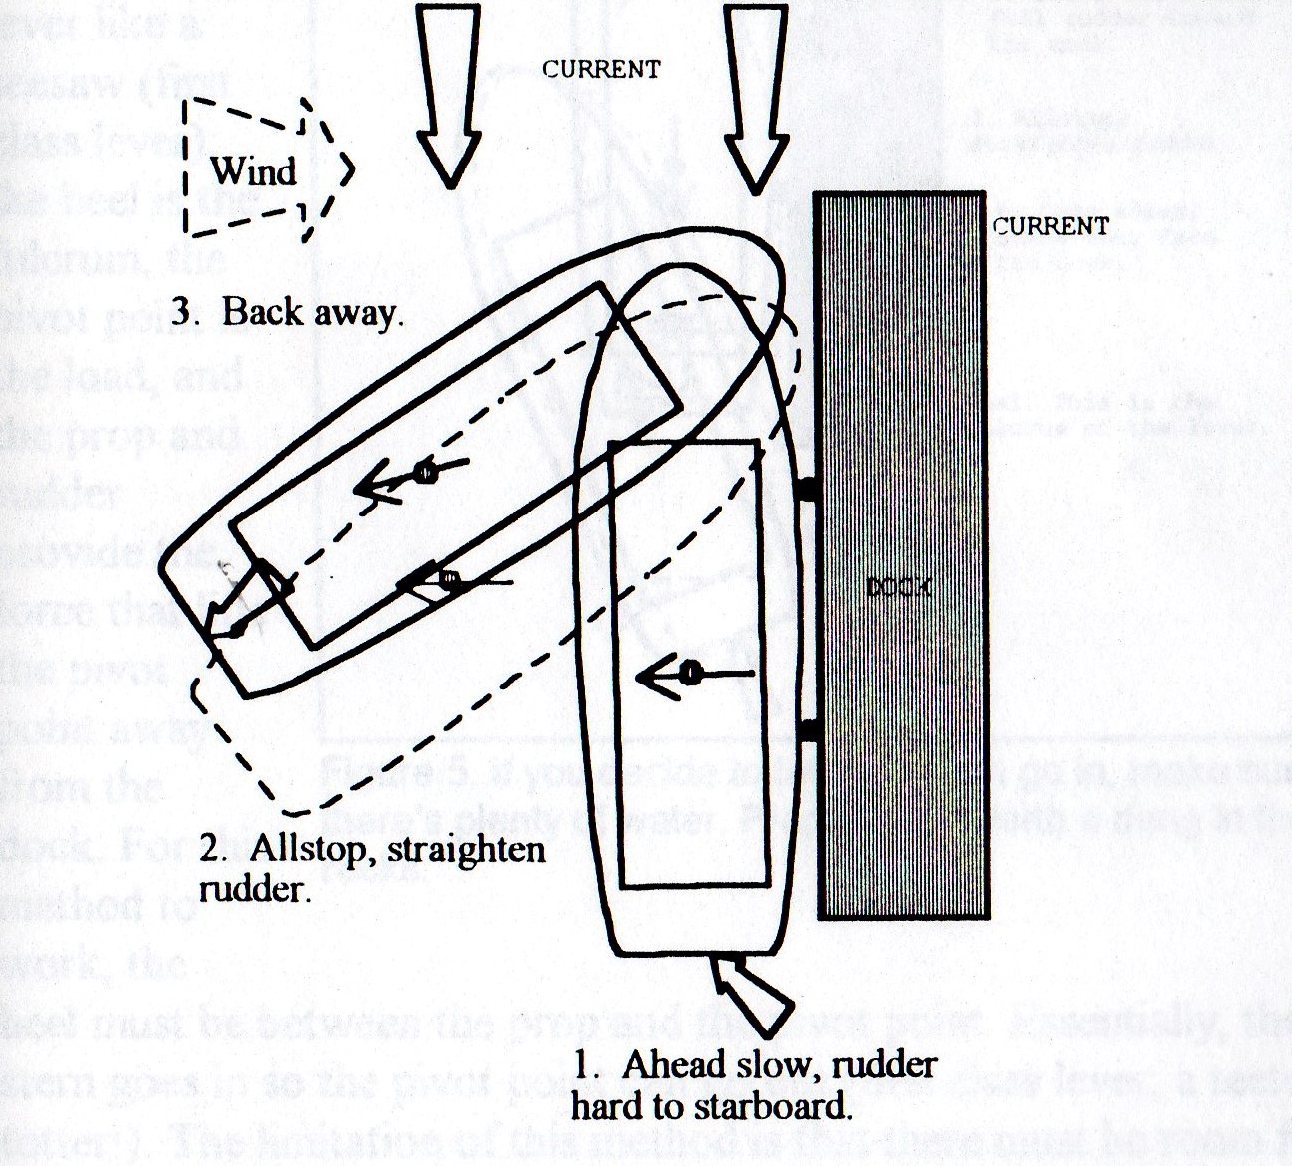
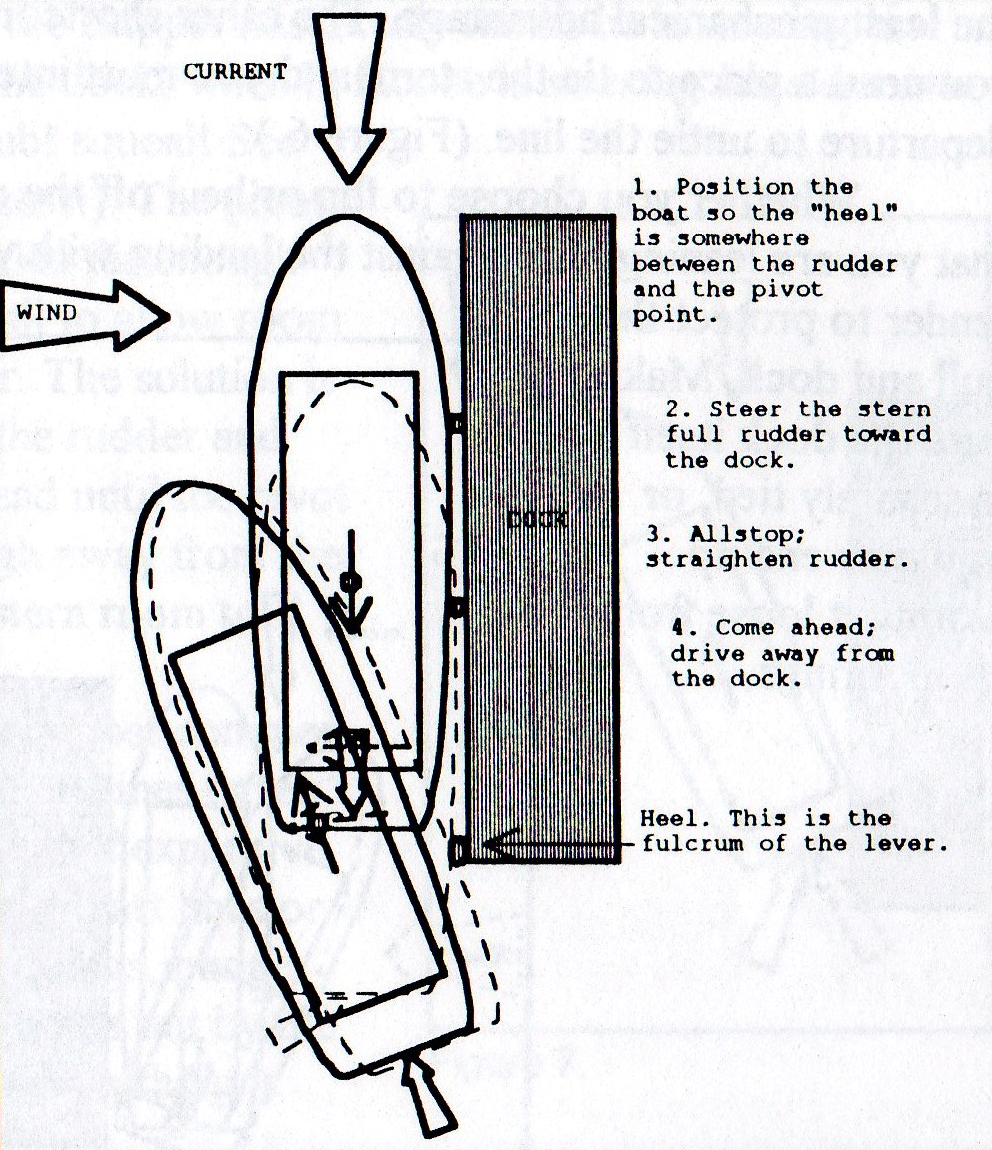
Step 7: Departures
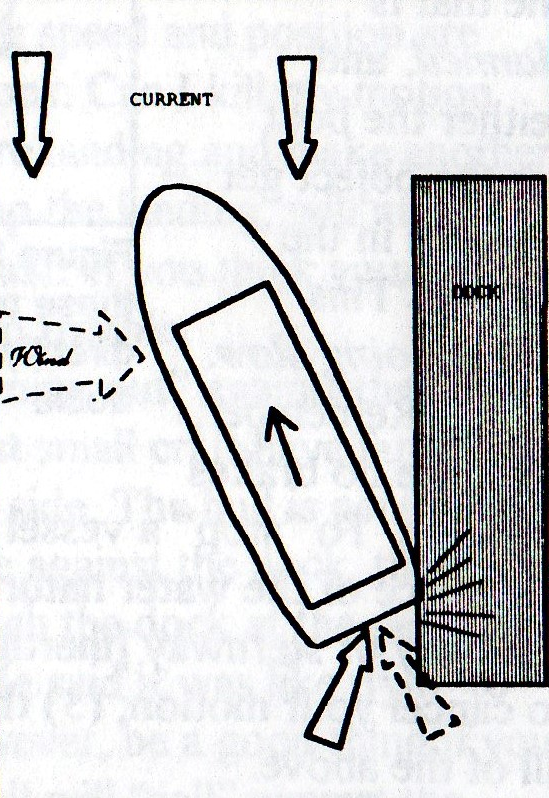
Leave the dock with confidence. no matter the wind or crowd.Step 8: Docking & Landing
Eliminate stress. Approach and tie up with calm control.Step 9: Seamanship & Etiquette
Move beyond ownership to respected seamanship. Safety and courtesy earn trust.
Before: Stressful launches, white-knuckle landings, self-doubt in public.
After: Smooth departures, confident returns, respected as a true captain.
The Result
By the end of the 9 steps, you don’t just own a boat, you own the knowledge and skills to command it—or any vessel—forever. The Enlightened Pilot brings you the extra comfort and ease that take boating to the highest levels of safety and enjoyment.
Dealerships & Clubs offering this program demonstrates a commitment to building and keeping a cared-for, loyal clientele.